Tuesday 29 May 2012

Maternity Outfit # 2 First Trimester

Hey!
So, my pregnant + FMS self has been waaay slowed down. While I am still working on things those things are taking forever to finsih which is why my posts have slowed down as well. So maternity outfits for now. As you can see I started showing at an almost shocking rate and though I am officially in my second trimester I thought I would share an outfit from a few weeks back!


Blazer: Ann Taylor
Top: H&M (thrifted)
Sash: Victoria's Secret robe sash (ancient)
Jeans: (which you can't really see) Thyme Maternity

Tutorials are in the offing!

Thursday 10 May 2012

Maternity Outfit #1 First Trimester

Hey everyone!

No tutorial today. I just wanted to officially share that I'm growing a person! Since I love clothes as much as I do I thought I would contribute to the wealth of maternity fashion pics online. I'm just at the end of my first trimester now (11 weeks!) but I popped super early so i got to start showing of my belly almost as soon as we found out!

Maternity Outfit #1
First Trimester
Stripes and stripes!

Hat: Thrifted
Scarf: Gifted
Sweater: Joe Fresh
Top: Joe Fresh
Jeans: h.i.p.
The future holds more tutorials!

Monday 7 May 2012

Wrap around earrings

Hey,

This is a super simple project and unfortunatley I forgot to take pictures (again) so you're going to have to image the majority of the tutorial but I'm sure you'll have no problem.

Here's the finished Wrap Around Earrings


Materials:
Hoop earrings
Yarn
Crochet hook
Hair spray

Step One
Crochet all round the outside of your hoop (actually took this picture).


Step Two
Wrap. Wrap horizontally until the yarn is as dense as you want it then wrap vertically. When you wrap vertically make sure you pull the yarn through the top of the hoop so you get that dip look (and a spot for you ear lobe to go). Then tie the yarn off and weave it in.


Step Three
Spray. The yarn's not super stable yet. I just hair-sprayed the earrings, pressed a tissue over them to get rid of the bubbles and let them dry. They're pretty firm now!

Have fun!


Sunday 6 May 2012

Origami Heart Necklace

Hey everyone,

It origami time!

I have always been fascinated by paper folding but had little to do with a bunch of folded paper. Add to that my near-convulsive reaction to wasting things and I, unsurprisingly, never really got into folding paper for fun. Fortunately, I am into fabric and it turns out the two go together beautifully.

Without further ado The Origami Heart Necklace
ps, that's a baby not a beer belly :D


Step One:
You'll need three squares of paper (about an 1.5") for the small hearts and one big one for the big heart. I used paper but it does mean the necklace can't get wet. There are other fabric stiffening materials that are probably ideal. I didn't think about that till later as I'm a bit of a spaz.


Step Two:
Choose your fabric, cut a square with a little bit of a seam allowance (just enough for the stitching) and pin.


Step Three:
Sew the fabric square to the paper square. I chose cotton from an old tshirt as it won't fray too badly (this fabric is actually left over from my Dinosaur T-shirt refashion).

Front


And back.

Step Four:
Fold those suckers into four origami hearts.
Here's a great tutorial.

Step Five:
Sew your first heart to your choice of necklace. I used a braided thin, white yarn. Metal would look great but it irritates my skin.


 Step Six:
Get everyone else one there and...

Voila!

Origami Heart Necklace


Saturday 5 May 2012

Half and Half T-shirt

Hello Lovely Crafters!

So, I haven't been crafting as much as I would like lately. Or rather, the projects I'm working on are more long term. You will see them eventually but I can still only work in relativey small spurts. But whatever, at least I'm working :D

When I woke up this morning I was feeling a little grustrated by how long it had been since I had actually completely something. So, I decided to start a 5 minutes project. This is something I had been meaning to do for a long time but had been putting off because it was such a tiny project (how's that for self-sabotage?)

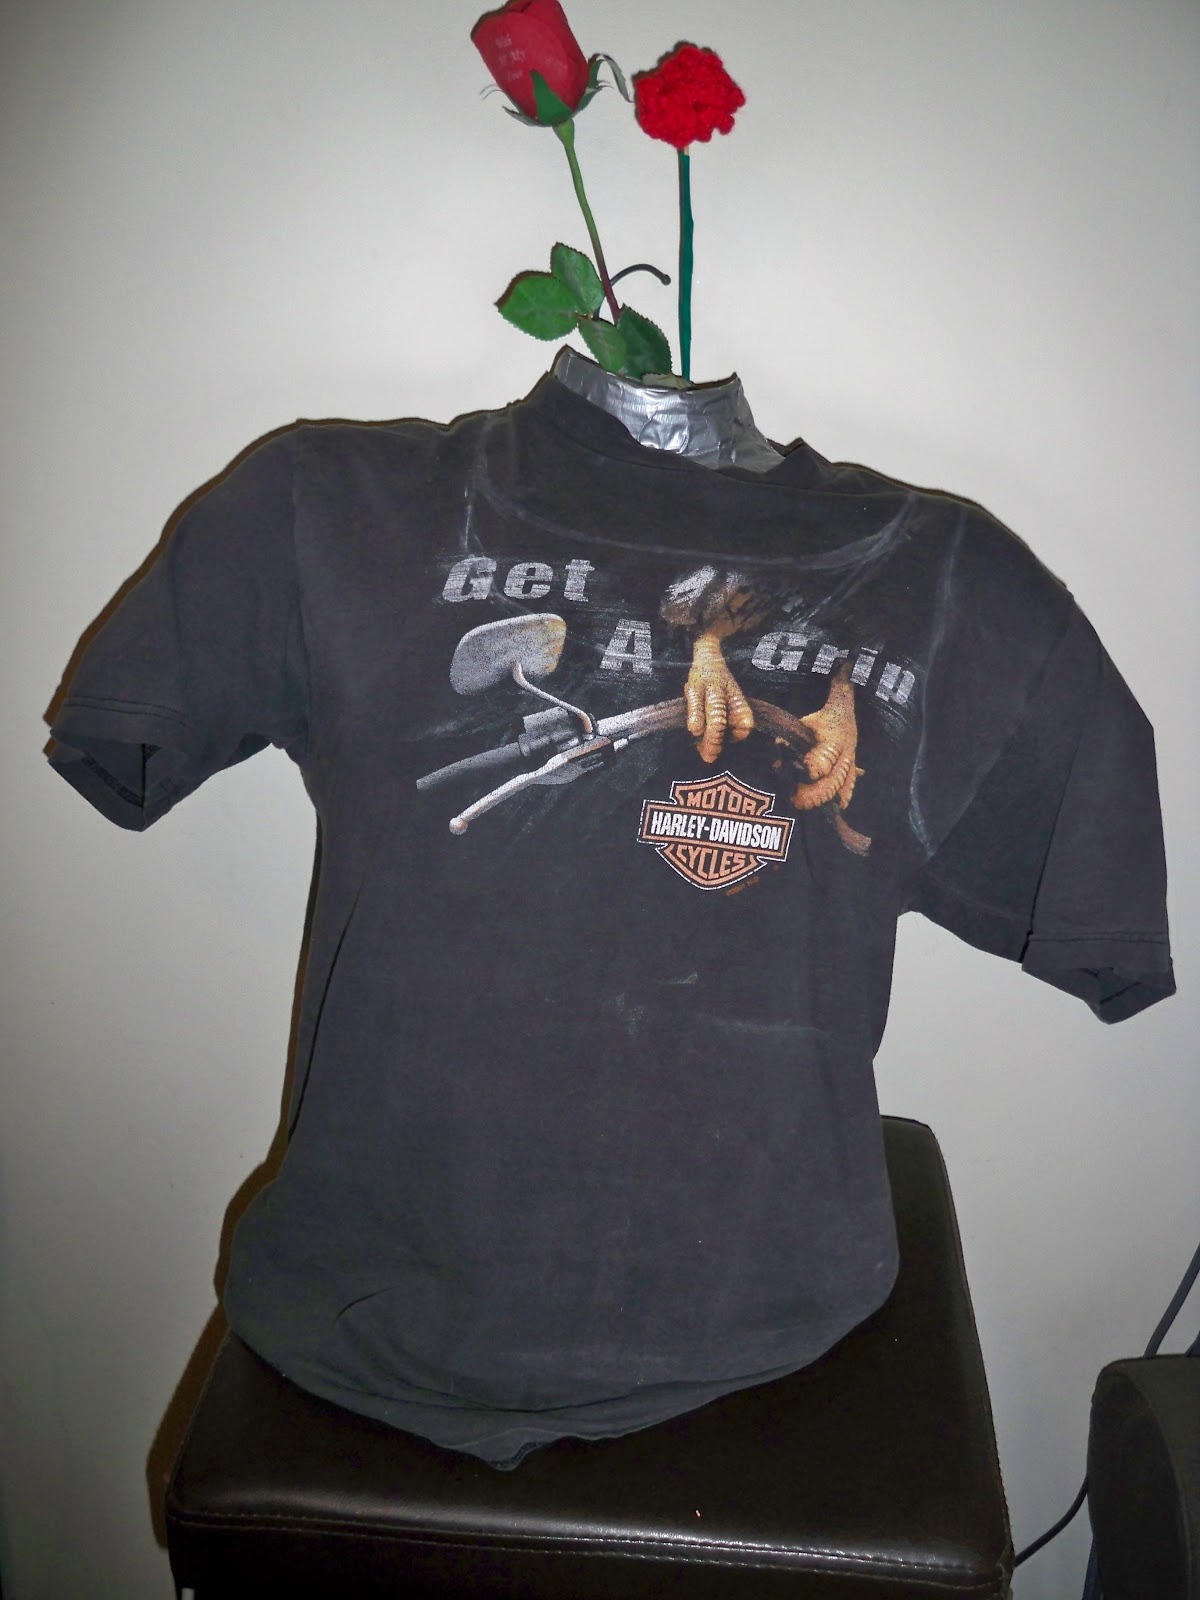
Anyway, it all started with this super cool shirt I have had since I was a kid and haven't been able to let go of. Takes me back to teenage motorcycle roadtrips!


While nostalgic it was certainly not stylish but it's all good. I have scissors!

I have been wanting to try this tshirt reconstruction I had found on Pinterest forever and had never gotten to it. This is my inspiration from www.oaknyc.com :


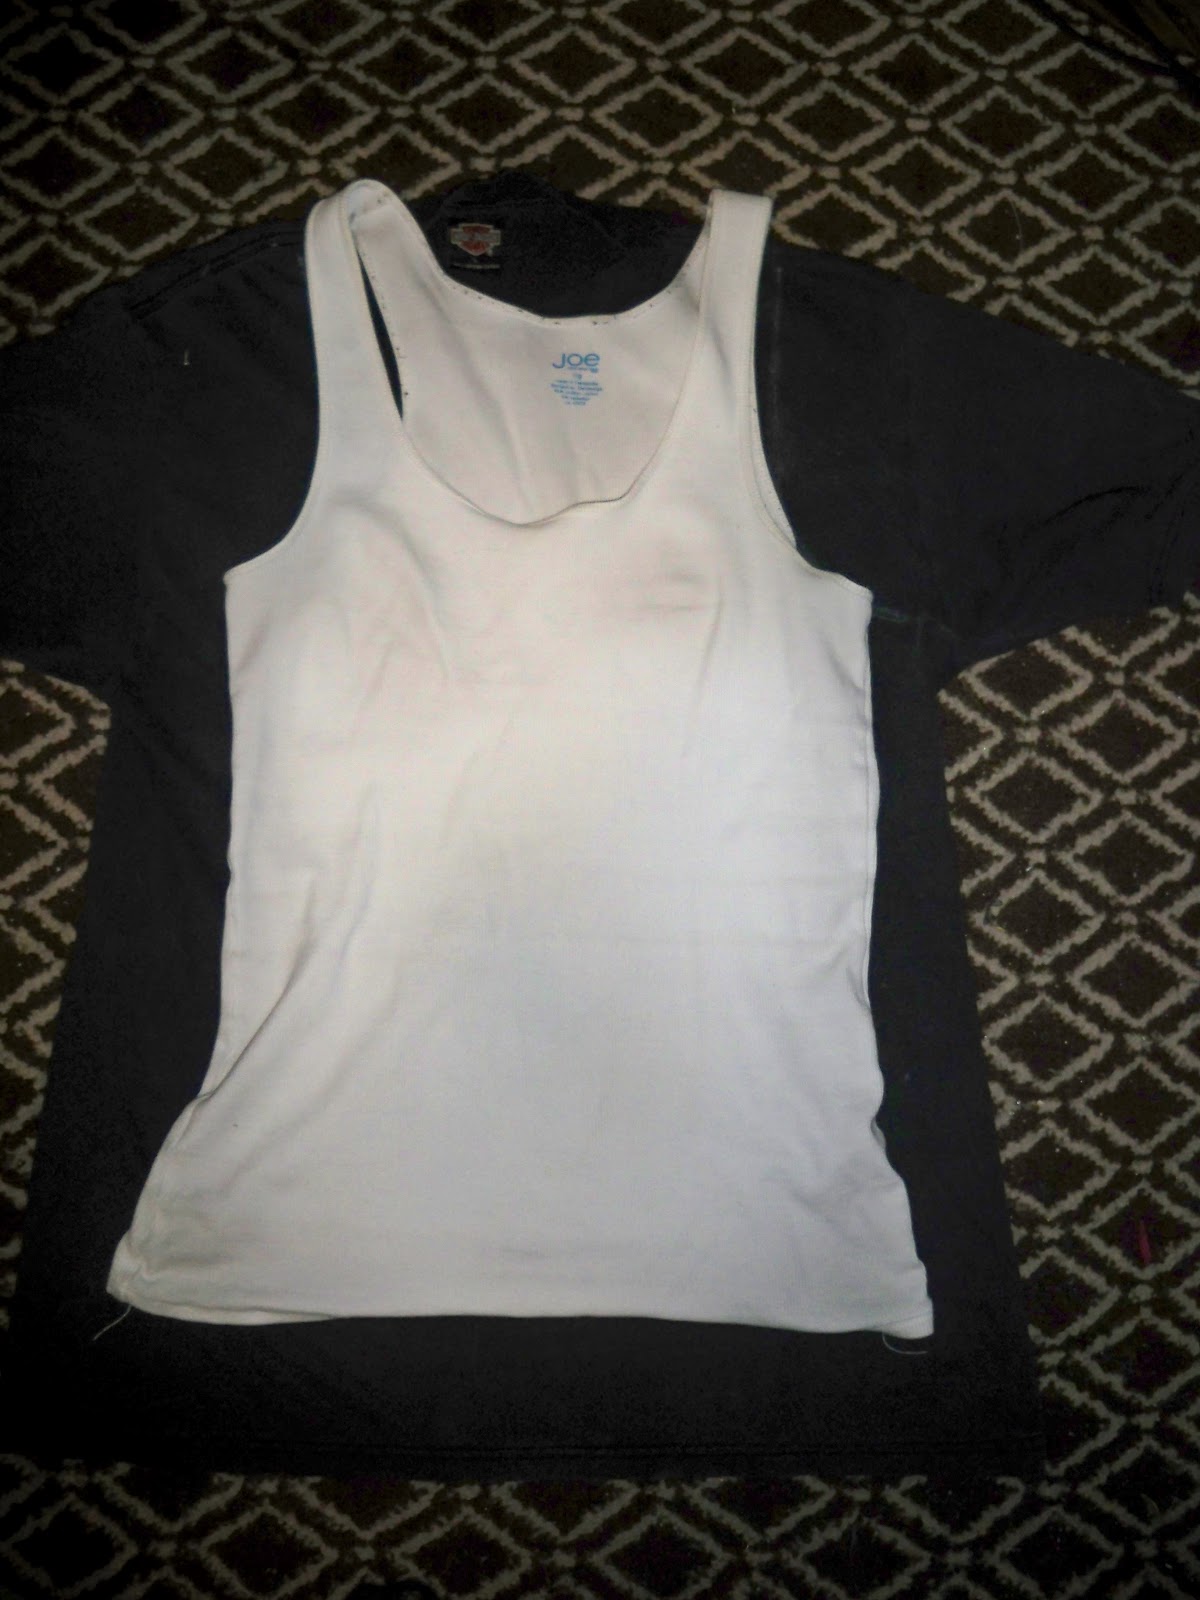
Easiest way to make a new pattern is to CHEAT CHEAT CHEAT and copy something else you own that looks about right.


Okay, here is a good chance to learn from my (perpetual) mistakes. Don't trace on the right (out) side of your shirt with the chalk. You want to turn the shirt inside out and trace on the other size...I'm such a space cadet...


I brought the collar up so the logo wasn't cut out.

Back too (ps you'll want the back collar as well)...
Pop it on the form (floor works too if you're formless)
Snip. Snip.
Snippity snip.

 And the finished product. After about 3 minutes of very hard work. Voila:

The Half and Half T-shirt


Pretty freakin' awesome I think :)
See you soon!