
Sunday, 11 November 2012
Hiatus
I'm taking some time off to snuggle by newborn baby boy. I'll return with more craftiness in 2013!
Saturday, 8 September 2012
Crocheting for my baby boy!
Hello foxy crafters!
The world seems rife with boring overly cutesy baby clothes and I'm just not cool with it. Luckily I have some craftiness up my sleeve. Here's what I've made so far. Click the pics to be taken to the patterns:


The world seems rife with boring overly cutesy baby clothes and I'm just not cool with it. Luckily I have some craftiness up my sleeve. Here's what I've made so far. Click the pics to be taken to the patterns:
Friday, 7 September 2012
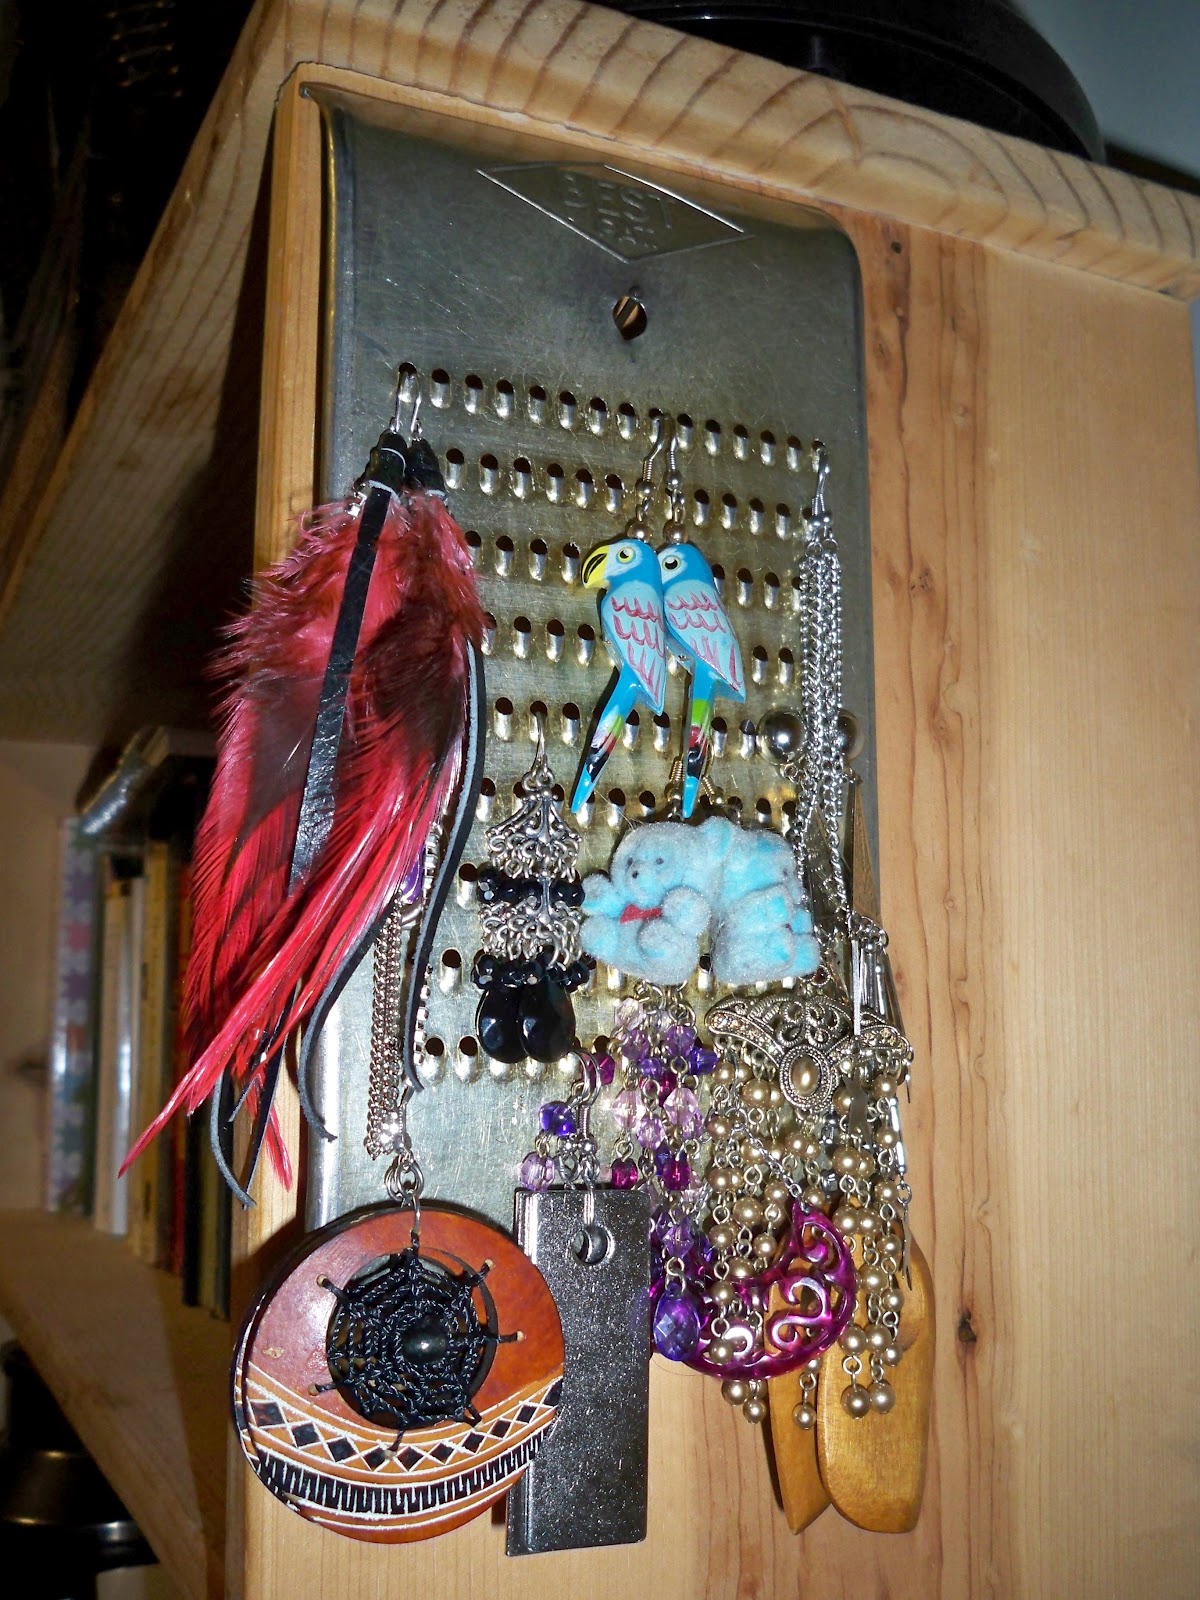
DIY Jewelry Display
Hello to you other crafty foxes,
Not long ago I posted this article on my antique-cheese grater turned earring display. It was all well and good EXCEPT that my other lovely jewelry went undisplayed, unorganized, neglected and generally sad. I love my jewelry far too much to leave it in such a state! Luckily, though my husband's craftiness hides somewhere beneath his concious mind his eye in a thrift store is epic and he found a beauitful old wooden shoe shiner box, which, turned sideways and screwed to my wall, proved absolutely perfect.


Not long ago I posted this article on my antique-cheese grater turned earring display. It was all well and good EXCEPT that my other lovely jewelry went undisplayed, unorganized, neglected and generally sad. I love my jewelry far too much to leave it in such a state! Luckily, though my husband's craftiness hides somewhere beneath his concious mind his eye in a thrift store is epic and he found a beauitful old wooden shoe shiner box, which, turned sideways and screwed to my wall, proved absolutely perfect.
Earrings on their own
(all sad)
Jewelry all together
(yay!)

Thursday, 6 September 2012
Pants! Pants! Pants!
Hello crafters!
Not long ago I posted about a pair of silver pants I made myself. Those pants have lead to a bit of a pants making addiction. Today I would like to share my little obsession...
Not long ago I posted about a pair of silver pants I made myself. Those pants have lead to a bit of a pants making addiction. Today I would like to share my little obsession...
 |
| All made from Kwik Sew #3807 (with my own alteration for fit) |
Friday, 17 August 2012
Cloth Necklace
Hello crafty people
{crafty like a fox}
No refashioning today. Just an oldschool DIY. I made this cloth necklace with some fabric I bought at a thrift store (took me forever to figure out what to do with it but I loved it so much!) but this DIY in particular is usually done with an old t-shirt. Probably works best with jersey, I did it with a shiny, non-stretchy fabric. No freakin' idea what it might be made of (I'm not quite that good).
This is a simple project. I just whipped it up in about 45 minutes. You just cut the fabric into strips to make your braid (I doubled them for a bulkier braid), sew off the ends and attatch a whole bunch of strips for the rest of the necklace. Super easy and super cute! Perfect for summer. Enjoy! (+ my amateur artsy photos :P )


See you soon!
Thursday, 16 August 2012
Second Trimester Outfit
Hey crafters.
Not so much crafting today, just sharing one of my all-time fav maternity outfits:

A close up on the belt becuase it really is one of the coolest things I own. Birthday win from my lovely sister!
Not so much crafting today, just sharing one of my all-time fav maternity outfits:

Silver + black cardigan: Gifted
Yellow tank: Motherhood Maternity 10$
Dark blue jeans: Thyme Maternity 59$ (This is what happens when you buy clothes instead of make them)
Jesus and Mary belt: Apartment
A close up on the belt becuase it really is one of the coolest things I own. Birthday win from my lovely sister!
 |
| Frakin' flash! |
Monday, 13 August 2012
Nerdy Crochet!
Hey everyone!
I know it's been for-frakin'-ever since I've posted and I apologize. I've been busy being pregnant and allowed that to get in the way of my blogging (FOR SHAME) but certainly have not allowed it to get in the way of my crafting (WOOT!)
This is by far one of my favourite things I've ever hooked:

Stay crafty!
M <3
I know it's been for-frakin'-ever since I've posted and I apologize. I've been busy being pregnant and allowed that to get in the way of my blogging (FOR SHAME) but certainly have not allowed it to get in the way of my crafting (WOOT!)
This is by far one of my favourite things I've ever hooked:

Who says crocheting can't be awesome?
The how-to is easy enough but I didn't have a pattern (naturally). I made my own and it`s acutally super easy to make your own crochet-by-numbers style pattern.
Step One:
Draw the outline (to scale) of your project on graphing paper.
Step Two:
Make your pattern by colouring in squares. You can use as many colours or as complicated a pattern as you want it just means you`ll be switching yarns more often.
Note:
For this project each square on graphing paper is acutally represented by 6 stitches done over two rows. On the bottom you have sc-dc-sc and on the top you have dc-sc-dc. It`s a technique I borrowed from groundhogpeggy on Youtube. She has a whole technique for crocheting images that look right from both sides. I`m not a fan of the overall technique as the contrasting yarns show through but the way she creates patterns on graph paper is really simple and easy to do. Stay crafty!
M <3
Monday, 23 July 2012
DIY Maternity Style: Second Trimester
Wow, it's been a long time! There are a few reasons for this. The first being a kindey infection, ew and ugh. I spent a few hours in the hospital before begging to come home as long as I promised to rest a lot.
And also, we found out we're having a BOY!!!
And...on with the fashion...
I'm finding that the bigger I get the more I care about how I look when I leave the house! Here are a bunch of my Maternity DIYs in actions:
 Shirt: Refashioned from thrifted XL Women's shirt
Ring: Made from scratch
Shorts: Refashioned from womens Tee and Lace

Haha! World's lack of cool maternity pants, you have met your match!
No DIYs here. Second trimester outfit:
 Hat: Thrifted
Dress: Zellers (non-maternity)
And also, we found out we're having a BOY!!!
And...on with the fashion...
I'm finding that the bigger I get the more I care about how I look when I leave the house! Here are a bunch of my Maternity DIYs in actions:

Ring: Made from scratch
Shorts: Refashioned from womens Tee and Lace

No DIYs here. Second trimester outfit:

Dress: Zellers (non-maternity)
Wednesday, 27 June 2012
Lace Shorts!
New tutorial for today!
I know that lace shorts have been a thing for a while now but I didn't know about them until I saw a woman wearing them at the doctors office and I was in love! But is there any chance that a maternity option is available for these beauties? Not a shot in hell. But that's okay because I have a sewing machine and a giant box of lace my aunt wanted to get rid of. Score!
You can use this tutorial to make non-maternity shorts really easily as when I make maternity bottoms I just keep the waist below the belly so that I can still wear my creations after the baby is born.
The Shorts

Sunday, 24 June 2012
Rocket Skirt/Top
Happy almost the end of June!
How is everyone liking my new blog?
I have another maternity tutorial for you today! At the thrift store a while back I found a wicked extra-large, extra-tall men's t-shirt that was covered in rocket ships. My non-pregnant self could have worn the thing as a dress it was so huge but prego me fills out the front a little to much. So, I made a new thing! It's a shirt/skirt for pregnant a ladies!

The tutorial:
Originally I wanted to make a dress using the rocket fabric a the skirt and and old black t-shirt as the top. These were my starting materials, I think the shirt was around 7$:
How is everyone liking my new blog?
I have another maternity tutorial for you today! At the thrift store a while back I found a wicked extra-large, extra-tall men's t-shirt that was covered in rocket ships. My non-pregnant self could have worn the thing as a dress it was so huge but prego me fills out the front a little to much. So, I made a new thing! It's a shirt/skirt for pregnant a ladies!
The finished product:

The tutorial:
Originally I wanted to make a dress using the rocket fabric a the skirt and and old black t-shirt as the top. These were my starting materials, I think the shirt was around 7$:
Sunday, 10 June 2012
Slippers!
Not too long ago I got these weird red bumps on my toes. They kinda freaked me out so I went to see a dermatologist about them. Apparently my toes are very sensitive to cold. A few pairs of warm socks and I would be all fixed up. Well, thanks doc, and that was all well and good until I attempted to wear those fleecy mountain man socks for more than an hour. And you know what? OW! So I asked the dermatologist about it but he turned out to be one of those asshats who don't believe FMS is a thing. I calmly informed him that it can be viewed on catscans and walked out.
Crocheting time!

These things are shockingly easy to make. I didn't follow a pattern so this tutorial will work for any yarn weight or hook size. Enjoy!
Ch enough to be as wide as three toes.
Crochet in the round (and stitch, I did dc), inc as you need to fit over your toes.
Measure against your foot as you go so they fit you perfectly.
Once you've reached the wide spot at the base of your toes stop increasing and crochet in roud as high as you want to go.
Then start crochet in rows so that you are creating the sole of the slipper and moving back toward the heel.
When you reach the heel decrease 3-5 with each stitch so that you create little half circle.
Tie off the heel and create two chains long enough to tie around your ankle. Single crochet them to the top of the heel in the cenre.
And VOILA! Slippers!
Saturday, 9 June 2012
New hotness!
New look!
In the immortal words of Will Smith:
"[The old blog was] old and busted, [the new blog is] new hotness!"
Feels more like me now. I hope you enjoy!
-Mikelina
In the immortal words of Will Smith:
"[The old blog was] old and busted, [the new blog is] new hotness!"
Feels more like me now. I hope you enjoy!
-Mikelina
Friday, 8 June 2012
Sewing Stuff and Beautiful Suitcases!
Hello Crafters
How's everyone doing this morning? I'm feeling pretty happy with myself as I made that top below in one day and got a dress about half-made. Not too shabby.
Now, one might say that organization is not exactly my forte. And if someone said that they would be being exceptionally generous. For example, this is how I stored my fabric and supplies until about two days ago:
Let me break it down for you so you can see what I'm working with:


How's everyone doing this morning? I'm feeling pretty happy with myself as I made that top below in one day and got a dress about half-made. Not too shabby.
Now, one might say that organization is not exactly my forte. And if someone said that they would be being exceptionally generous. For example, this is how I stored my fabric and supplies until about two days ago:
 |
| I'm not even kind of kidding. |

Not so good, especially with a baby on the way. I can count about 150 death traps in that little stash. I was looking (in a very disciplined manner, and it did not take 12 hours) on pinterest for some ideas on repurpose-friendly and fashionable ways to store all of this crap. I found this from Ink Spot Workshop:
Thursday, 7 June 2012
Men's XL to Women's Maternity
Hello!
I told you I would get a tutorial up here sometime soon and I meant it! I guess I'm over the first trimester fatige (at 4 freakin' months!). I whipped this little beauty up yesterday afternoon and now it's my favourite maternity shirt!!! Read on for the tutorial:
I told you I would get a tutorial up here sometime soon and I meant it! I guess I'm over the first trimester fatige (at 4 freakin' months!). I whipped this little beauty up yesterday afternoon and now it's my favourite maternity shirt!!! Read on for the tutorial:
 |
| After |
 |
| Before |
Sunday, 3 June 2012
Organizing my Earrings
Hey everyone!
So, I have a lot of earrings and not a lot of space. For a while now I have been keeping my eyes open at thrift stores for some brilliant earring holding re-purpose. And yesterday I found myself a wicked old cheese grater! Does have one downside though: it only really hold the earrings that have hooks. Need to figure something else out for the studs. Here it is, quite a beauty...

So, I have a lot of earrings and not a lot of space. For a while now I have been keeping my eyes open at thrift stores for some brilliant earring holding re-purpose. And yesterday I found myself a wicked old cheese grater! Does have one downside though: it only really hold the earrings that have hooks. Need to figure something else out for the studs. Here it is, quite a beauty...
Tuesday, 29 May 2012
Maternity Outfit # 2 First Trimester
Hey!
So, my pregnant + FMS self has been waaay slowed down. While I am still working on things those things are taking forever to finsih which is why my posts have slowed down as well. So maternity outfits for now. As you can see I started showing at an almost shocking rate and though I am officially in my second trimester I thought I would share an outfit from a few weeks back!

So, my pregnant + FMS self has been waaay slowed down. While I am still working on things those things are taking forever to finsih which is why my posts have slowed down as well. So maternity outfits for now. As you can see I started showing at an almost shocking rate and though I am officially in my second trimester I thought I would share an outfit from a few weeks back!

Blazer: Ann Taylor
Top: H&M (thrifted)
Sash: Victoria's Secret robe sash (ancient)
Jeans: (which you can't really see) Thyme Maternity
Tutorials are in the offing!
Thursday, 10 May 2012
Maternity Outfit #1 First Trimester
Hey everyone!
No tutorial today. I just wanted to officially share that I'm growing a person! Since I love clothes as much as I do I thought I would contribute to the wealth of maternity fashion pics online. I'm just at the end of my first trimester now (11 weeks!) but I popped super early so i got to start showing of my belly almost as soon as we found out!

No tutorial today. I just wanted to officially share that I'm growing a person! Since I love clothes as much as I do I thought I would contribute to the wealth of maternity fashion pics online. I'm just at the end of my first trimester now (11 weeks!) but I popped super early so i got to start showing of my belly almost as soon as we found out!
Maternity Outfit #1
First Trimester
Stripes and stripes!

Hat: Thrifted
Scarf: Gifted
Sweater: Joe Fresh
Top: Joe Fresh
Jeans: h.i.p.
The future holds more tutorials!
Monday, 7 May 2012
Wrap around earrings
Hey,
This is a super simple project and unfortunatley I forgot to take pictures (again) so you're going to have to image the majority of the tutorial but I'm sure you'll have no problem.
Here's the finished Wrap Around Earrings


This is a super simple project and unfortunatley I forgot to take pictures (again) so you're going to have to image the majority of the tutorial but I'm sure you'll have no problem.
Here's the finished Wrap Around Earrings

Materials:
Hoop earrings
Yarn
Crochet hook
Hair spray
Step One
Crochet all round the outside of your hoop (actually took this picture).

Step Two
Wrap. Wrap horizontally until the yarn is as dense as you want it then wrap vertically. When you wrap vertically make sure you pull the yarn through the top of the hoop so you get that dip look (and a spot for you ear lobe to go). Then tie the yarn off and weave it in.
Step Three
Spray. The yarn's not super stable yet. I just hair-sprayed the earrings, pressed a tissue over them to get rid of the bubbles and let them dry. They're pretty firm now!
Have fun!
Sunday, 6 May 2012
Origami Heart Necklace
Hey everyone,
It origami time!
I have always been fascinated by paper folding but had little to do with a bunch of folded paper. Add to that my near-convulsive reaction to wasting things and I, unsurprisingly, never really got into folding paper for fun. Fortunately, I am into fabric and it turns out the two go together beautifully.
Without further ado The Origami Heart Necklace

Step One:
You'll need three squares of paper (about an 1.5") for the small hearts and one big one for the big heart. I used paper but it does mean the necklace can't get wet. There are other fabric stiffening materials that are probably ideal. I didn't think about that till later as I'm a bit of a spaz.


It origami time!
I have always been fascinated by paper folding but had little to do with a bunch of folded paper. Add to that my near-convulsive reaction to wasting things and I, unsurprisingly, never really got into folding paper for fun. Fortunately, I am into fabric and it turns out the two go together beautifully.
Without further ado The Origami Heart Necklace
 |
| ps, that's a baby not a beer belly :D |

Step One:
You'll need three squares of paper (about an 1.5") for the small hearts and one big one for the big heart. I used paper but it does mean the necklace can't get wet. There are other fabric stiffening materials that are probably ideal. I didn't think about that till later as I'm a bit of a spaz.

Step Two:
Choose your fabric, cut a square with a little bit of a seam allowance (just enough for the stitching) and pin.

Step Three:
Sew the fabric square to the paper square. I chose cotton from an old tshirt as it won't fray too badly (this fabric is actually left over from my Dinosaur T-shirt refashion).
 |
| Front |
 |
| And back. Step Four: Fold those suckers into four origami hearts. Here's a great tutorial. |

Step Five:
Sew your first heart to your choice of necklace. I used a braided thin, white yarn. Metal would look great but it irritates my skin.

Step Six:
Get everyone else one there and...

Voila!
Origami Heart Necklace
Saturday, 5 May 2012
Half and Half T-shirt
Hello Lovely Crafters!
So, I haven't been crafting as much as I would like lately. Or rather, the projects I'm working on are more long term. You will see them eventually but I can still only work in relativey small spurts. But whatever, at least I'm working :D
When I woke up this morning I was feeling a little grustrated by how long it had been since I had actually completely something. So, I decided to start a 5 minutes project. This is something I had been meaning to do for a long time but had been putting off because it was such a tiny project (how's that for self-sabotage?)
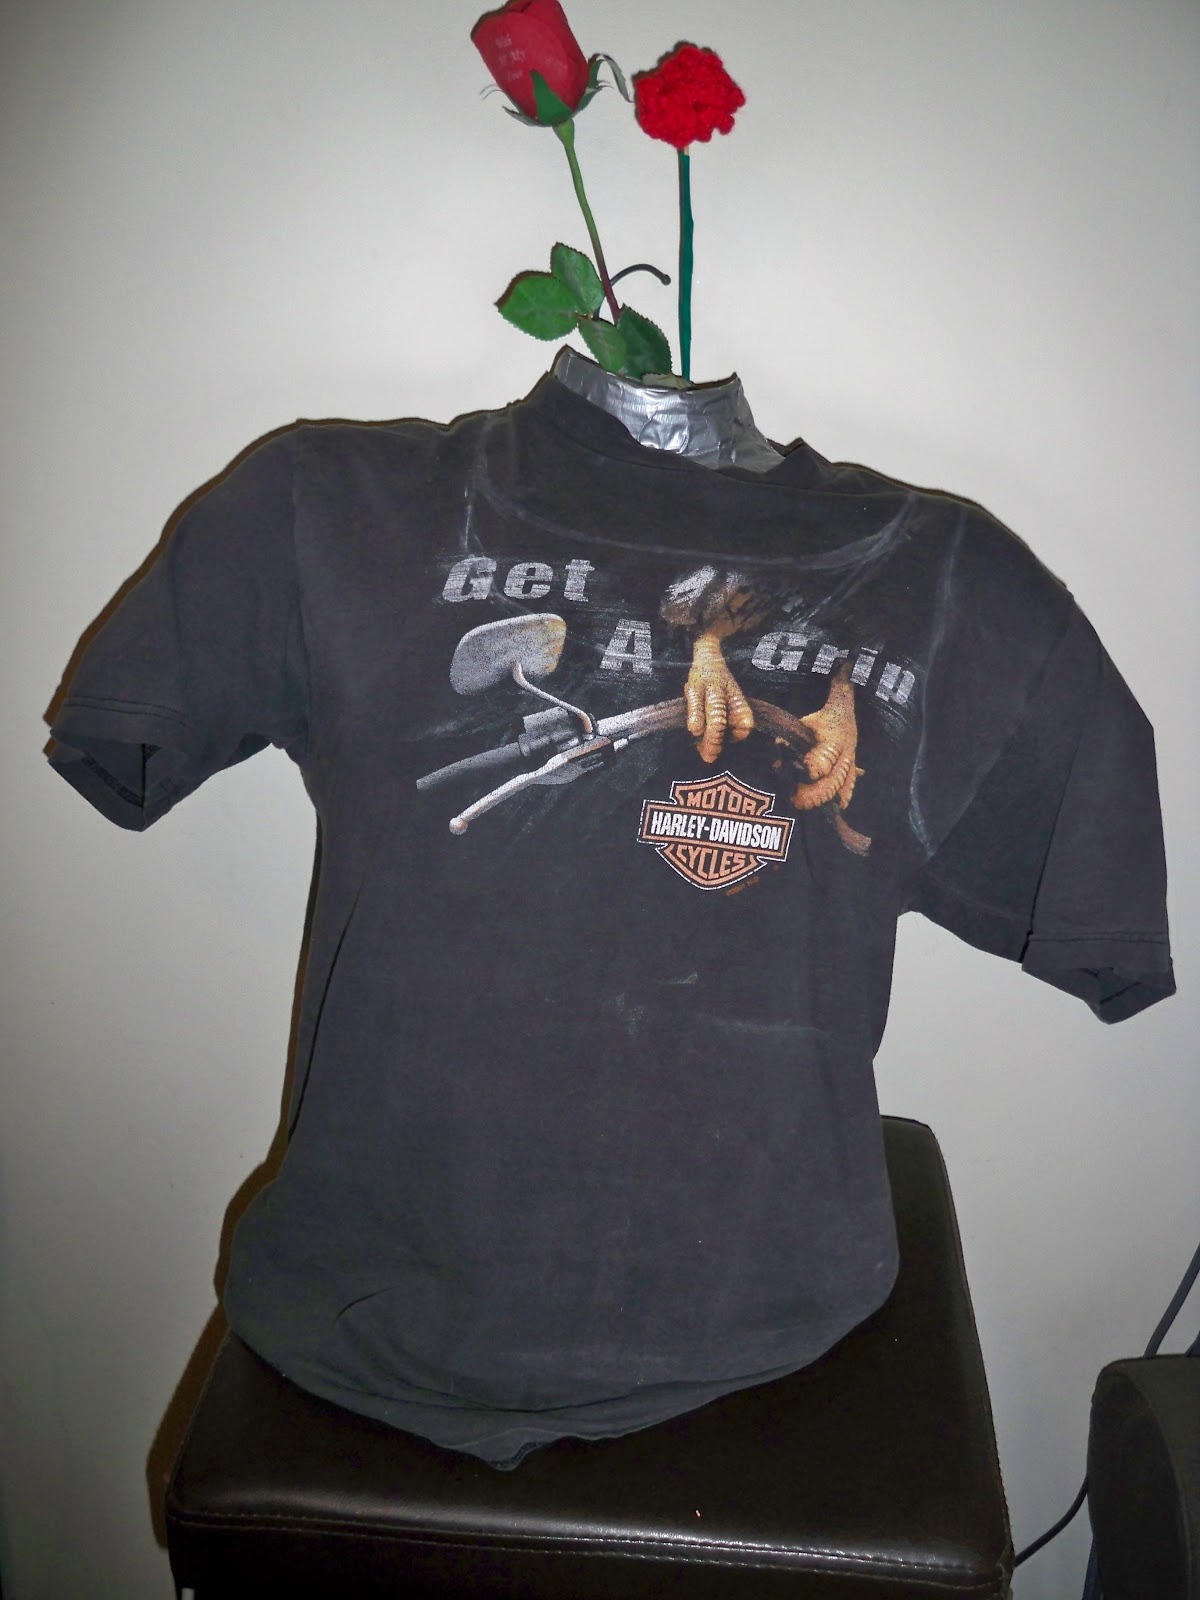
Anyway, it all started with this super cool shirt I have had since I was a kid and haven't been able to let go of. Takes me back to teenage motorcycle roadtrips!

While nostalgic it was certainly not stylish but it's all good. I have scissors!
I have been wanting to try this tshirt reconstruction I had found on Pinterest forever and had never gotten to it. This is my inspiration from www.oaknyc.com :


Okay, here is a good chance to learn from my (perpetual) mistakes. Don't trace on the right (out) side of your shirt with the chalk. You want to turn the shirt inside out and trace on the other size...I'm such a space cadet...
And the finished product. After about 3 minutes of very hard work. Voila:


Pretty freakin' awesome I think :)
See you soon!
So, I haven't been crafting as much as I would like lately. Or rather, the projects I'm working on are more long term. You will see them eventually but I can still only work in relativey small spurts. But whatever, at least I'm working :D
When I woke up this morning I was feeling a little grustrated by how long it had been since I had actually completely something. So, I decided to start a 5 minutes project. This is something I had been meaning to do for a long time but had been putting off because it was such a tiny project (how's that for self-sabotage?)
Anyway, it all started with this super cool shirt I have had since I was a kid and haven't been able to let go of. Takes me back to teenage motorcycle roadtrips!

While nostalgic it was certainly not stylish but it's all good. I have scissors!
I have been wanting to try this tshirt reconstruction I had found on Pinterest forever and had never gotten to it. This is my inspiration from www.oaknyc.com :
Easiest way to make a new pattern is to CHEAT CHEAT CHEAT and copy something else you own that looks about right.
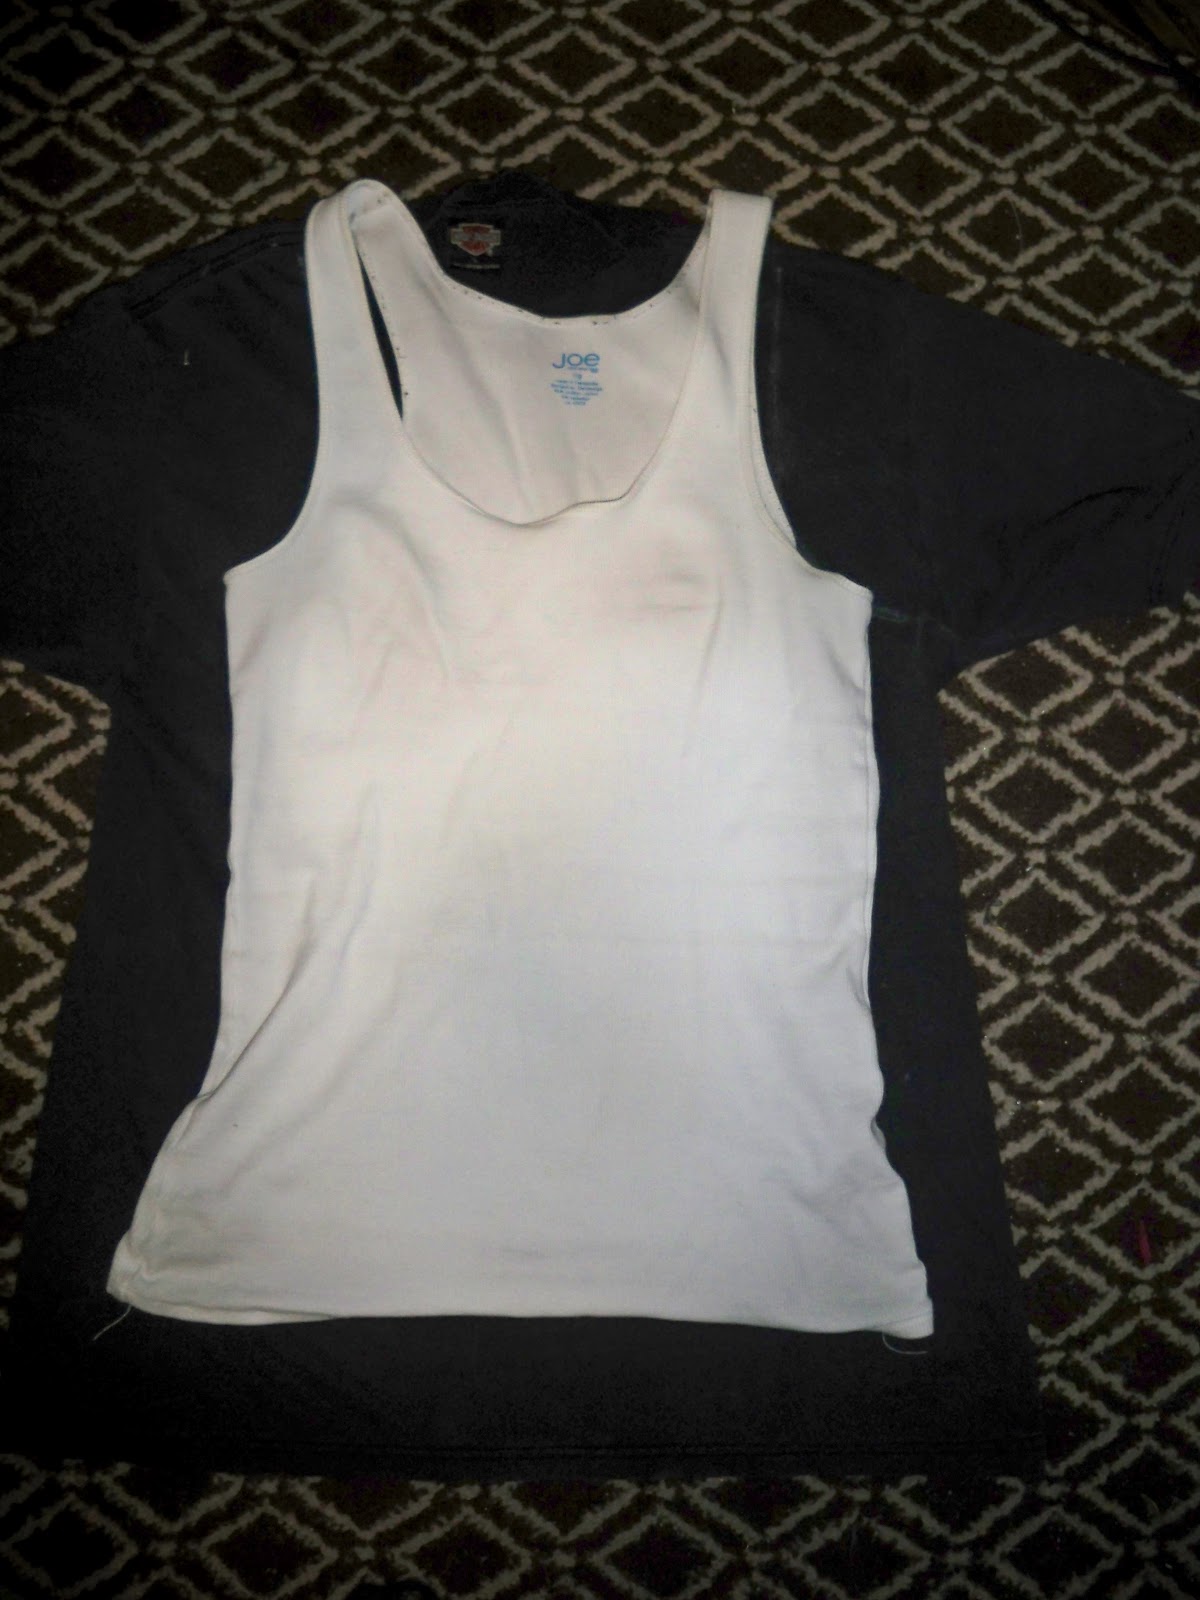
Okay, here is a good chance to learn from my (perpetual) mistakes. Don't trace on the right (out) side of your shirt with the chalk. You want to turn the shirt inside out and trace on the other size...I'm such a space cadet...
 |
| I brought the collar up so the logo wasn't cut out. |
 |
| Back too (ps you'll want the back collar as well)... |
 |
| Pop it on the form (floor works too if you're formless) |
 |
| Snip. Snip. |
 |
| Snippity snip. |
And the finished product. After about 3 minutes of very hard work. Voila:
The Half and Half T-shirt


Pretty freakin' awesome I think :)
See you soon!
Saturday, 28 April 2012
Oversized Envelope Clutch
Hello!
It has been a while since I've posted something new up here. I was having brain-melting computer troubles but my brain has been unmelted, my computer replaced and my harddrive restored so...I'm back!
While all of that nonsense was happening was, of course, busy making cool things to share with you. So, without further ado the
Oversized Envelope Clutch Tutorial

I started out with this very cute Juniors dress (yep, that's a dress) that I found at a thrift store for about 11$. It was a size 3 so there was no way I could wear it but I couldn't pass up that gorgeous print!


As I often do, apparently, I forgot to take pictures of the first part so put get ready to use that imagination. First thing to do is decide how big you want your clutch to be. You need something to stiffen the fabric. I used cereal boxes, without thinking that that means I can't take it out in the rain (in Vancouver)...yep...
You'll need two rectangles, one a little thinner than the other and a triangle for the top flap. Then wrap your fabric around your base.
 It also needs a liner so that you can't see that base evertime you open the thing.


And VOILA!
Pretty cool eh?
Thanks for stopping by!
It has been a while since I've posted something new up here. I was having brain-melting computer troubles but my brain has been unmelted, my computer replaced and my harddrive restored so...I'm back!
While all of that nonsense was happening was, of course, busy making cool things to share with you. So, without further ado the
Oversized Envelope Clutch Tutorial

I started out with this very cute Juniors dress (yep, that's a dress) that I found at a thrift store for about 11$. It was a size 3 so there was no way I could wear it but I couldn't pass up that gorgeous print!
I tried pinning it in billion different ways (8) and while there were all fine none of them were really . doing anything for me. I think it was the quality of the fabric. That sheen was keeping it from being the funky, casual top I had envisioned. So, I changed the plan.

As I often do, apparently, I forgot to take pictures of the first part so put get ready to use that imagination. First thing to do is decide how big you want your clutch to be. You need something to stiffen the fabric. I used cereal boxes, without thinking that that means I can't take it out in the rain (in Vancouver)...yep...
You'll need two rectangles, one a little thinner than the other and a triangle for the top flap. Then wrap your fabric around your base.


Now sew it all together (make sure you left yourself a seam allowance).

Need a strap as well (I also added a button just at the point of the flap).

Pretty cool eh?
Thanks for stopping by!
Subscribe to:
Comments (Atom)